Place an order of $300 or more of custom t-shirts or apparel and get free shipping in Canada. 🎉

How to Use the Designer | Custom Your T-Shirt
🎨

How to Use the Designer

Create stunning custom apparel with our easy-to-use online design tools

Quick Answers

1 How do I add text to my design?

  1. Click the "Add Text" button in the top toolbar
  2. Choose a decoration type (DTF, Screen Print, or Embroidery)
  3. Type your text and click "ADD TEXT"
  4. Use the Text Properties panel on the left to change font, color, size, and add effects

2 How do I upload my own artwork?

You have two options:

  1. Button Method: Click "Add Design" → Choose your decoration type → Select "My Uploads" → Upload your file
  2. Drag & Drop: Simply drag your image file directly onto the product's decoration area

Supported formats: PNG, JPG, TIF, PDF, EPS, SVG, and EMB (embroidery)

3 Can I add team names and numbers?

Yes! Our designer has a built-in team roster feature:

  1. Click "Add Team Name" in the top toolbar
  2. Select your decoration type
  3. Enter the sizes and quantities for your team
  4. Fill in each player's name and number

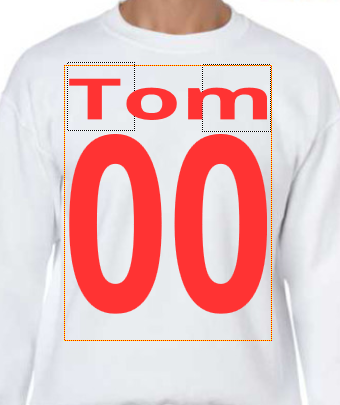
The system will automatically style them in a jersey-inspired layout!

4 How do I recolor an embroidery design?

  1. Click on the embroidery design on your product
  2. In the Image Properties panel, find the color swatches
  3. Click the color you want to change
  4. Use the Color Picker to select from the palette, enter RGB/HEX codes, or search for specific thread names

5 How do I save my design for later?

  1. Click the 💾 Save icon in the bottom right corner
  2. Log in or create an account if prompted
  3. Enter a name for your layout
  4. Find your saved designs in "My Account" → "Saved Layouts"

6 How do I share my design with others?

  1. Click the 🔗 Share icon in the bottom right corner
  2. Choose how to share: Facebook, Twitter, Pinterest, or Email
  3. A link to your design will be generated for others to view!

7 What file formats can I upload?

We support a wide variety of file types:

  • Raster Images: PNG, JPG, JPEG, TIF, TIFF
  • Vector Graphics: PDF, EPS, SVG
  • Embroidery Files: EMB

Tip: Vector files (PDF, EPS, SVG) allow you to recolor individual elements!

8 Why is my design getting cropped?

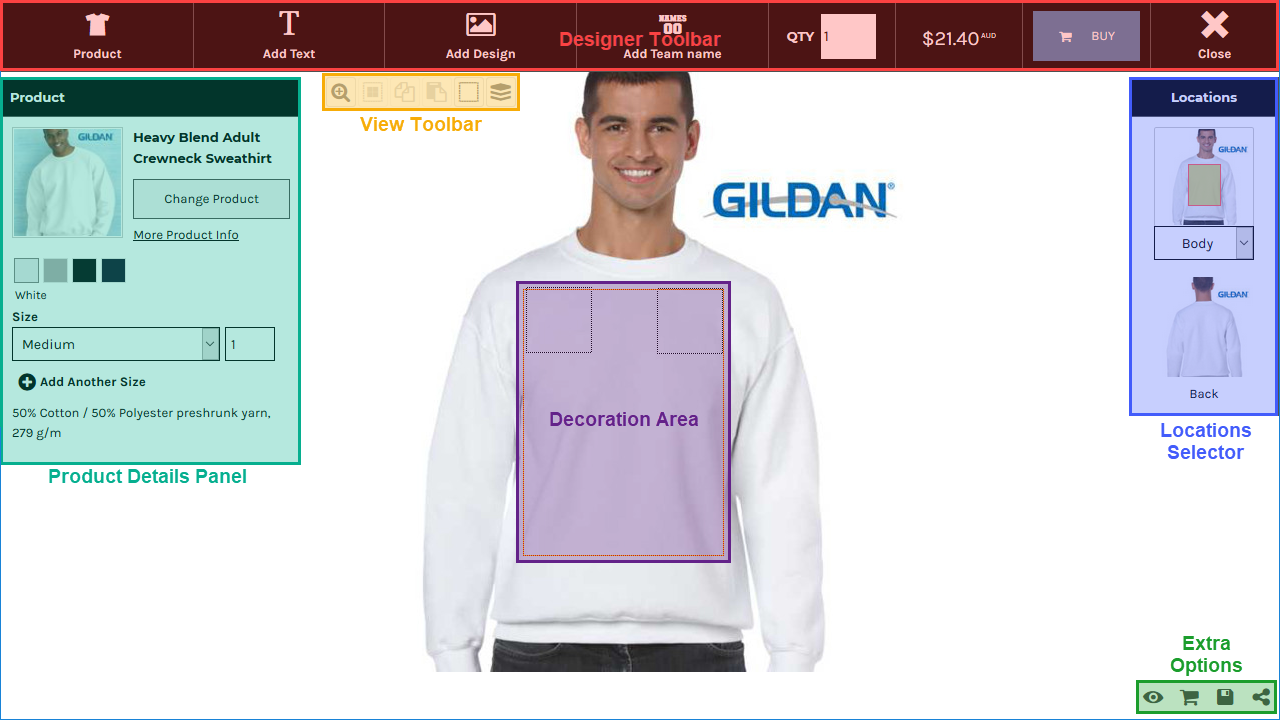
The Decoration Area (visible box on the product) defines where your design can be printed. Any elements outside this area will be cropped.

Solution: Make sure all your text and graphics are fully inside the decoration area boundary. You can resize or reposition elements to fit.

Detailed Guide

Step 1 Understanding the Designer Interface

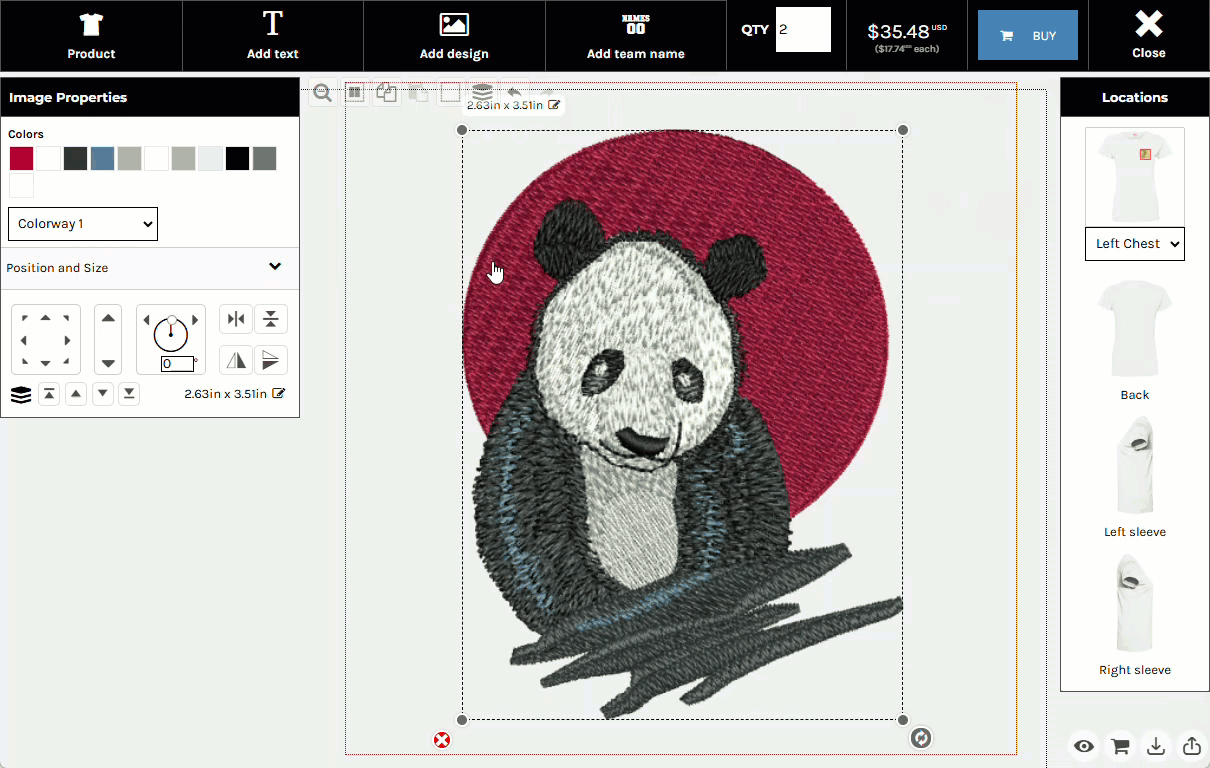
The Online Designer is a powerful tool that lets you create custom designs directly on products. Here's an overview of the main areas:

Online Designer Overview
Key Areas: The designer consists of the Top Toolbar (actions), Left Panel (properties), Center Workspace (your design), and Right Panel (product views).
  • 1
    Designer Toolbar (Top) Includes "Product," "Add Text," "Add Design," and "Add Team Name" buttons.
  • 2
    Product Details Panel (Left) Shows current product info, size selection, and the "Change Product" button.
  • 3
    View Toolbar (Center-Top) Small toolbar for zoom and "View/Organize Layers." View Toolbar
  • 4
    Decoration Workspace (Center) Shows the product mockup and the "Decoration Area" where your design must stay.
  • 5
    Locations Selector (Right) Switch between product views (Front, Back, Sleeve, etc.).
  • 6
    Extra Options (Bottom Right) Icons for Preview, Cart, Save, and Share. Extra Options

Step 2 Changing the Selected Product

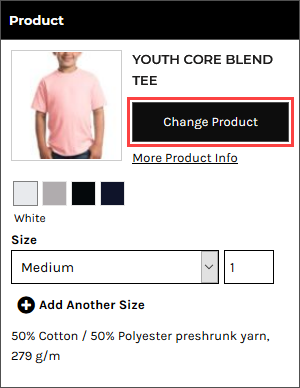
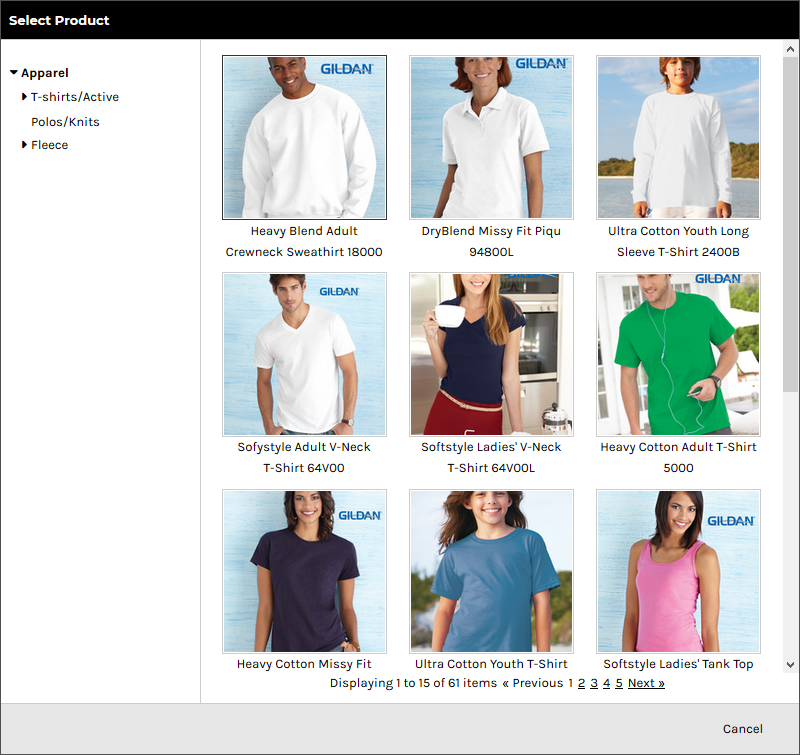
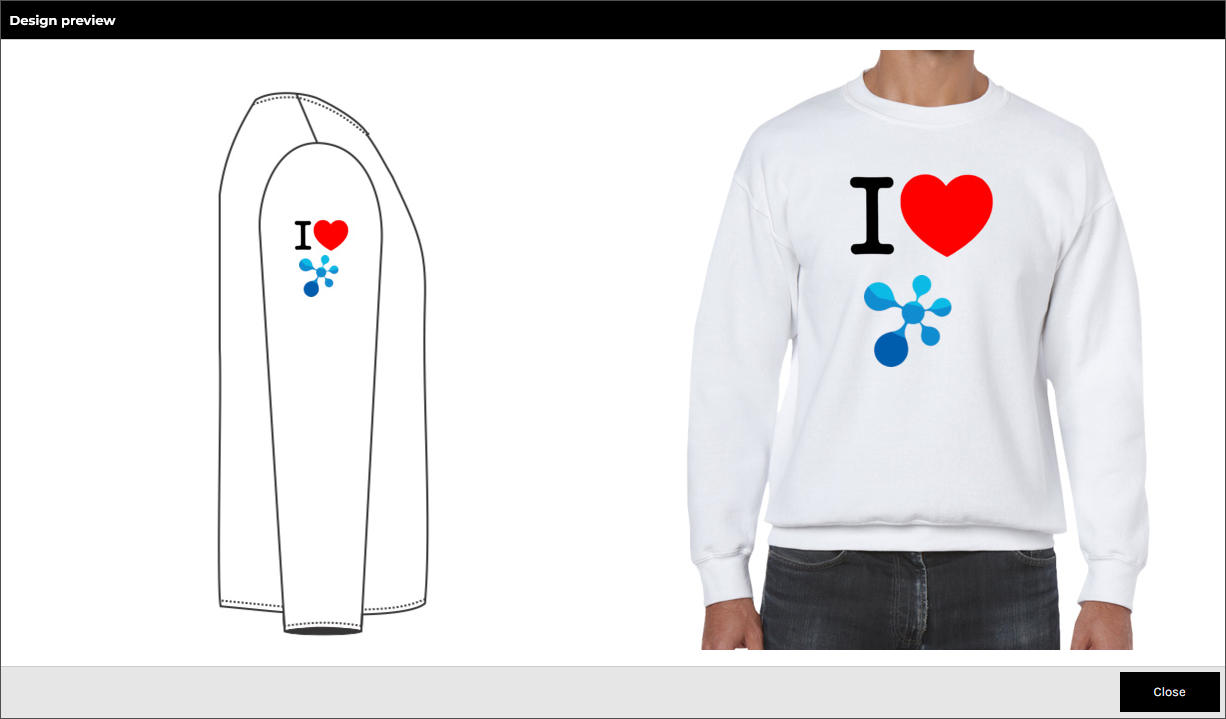
Want to try your design on a different product? Here's how:

  • 1
    Click the "Product" button Located in the top toolbar. Product Button
  • 2
    Click "Change Product" In the Product Details panel on the left. Product Details Panel
  • 3
    Select a New Product Browse the popup gallery and click to select your new product. Select Product Popup
Pro Tip: Your design will automatically transfer to the new product! Just make sure it fits within the new decoration area.

Step 3 Adding and Styling Text

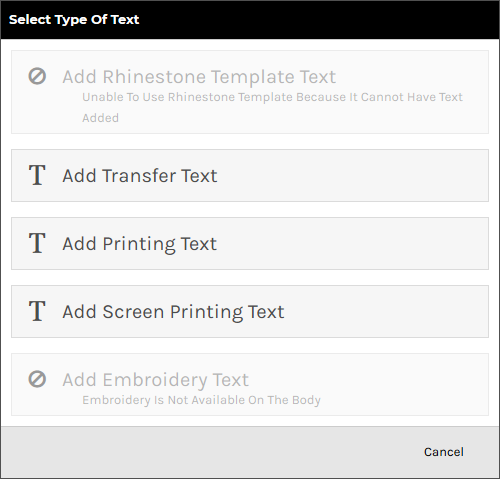
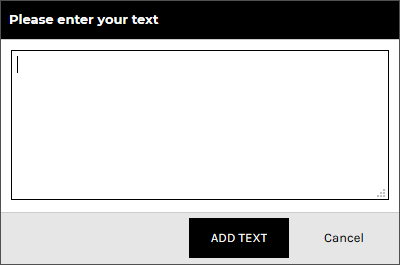
Add custom text to your design with full control over fonts, colors, and effects.

  • 1
    Click "Add Text" In the top toolbar. Add Text Button
  • 2
    Select Decoration Type Choose DTF, Screen Print, or Embroidery based on your product. Select Type of Text
  • 3
    Enter Your Text Type your message and click "ADD TEXT". Enter Your Text
  • 4
    Customize Your Text Use the Text Properties panel to adjust: Text Properties Panel

Text Customization Options:

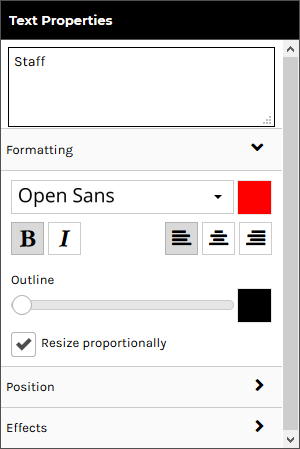
Formatting: Change font, color, bold/italic, alignment, and outlines.

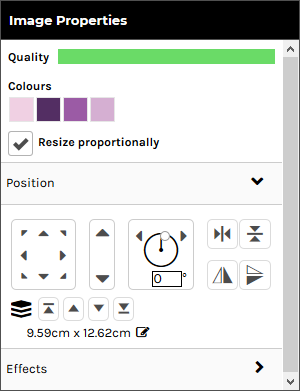
Position: Move, resize, or rotate using arrows or sliders.

Position Controls

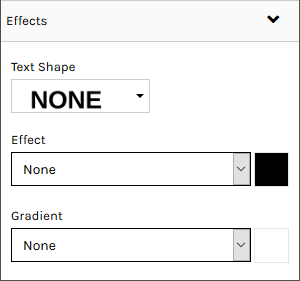
Effects (DTF only): Apply shapes (arch/wave), shadows, glows, or gradients.

Effects Controls

Step 4 Adding Designs & Artwork

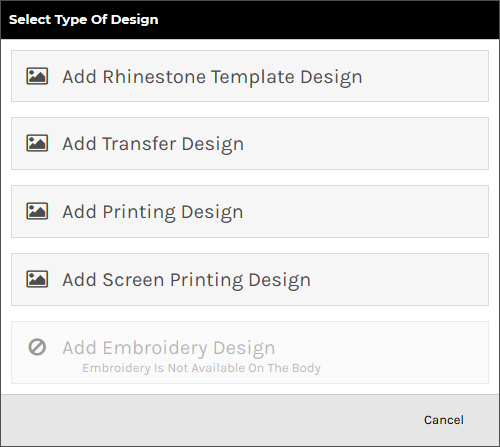
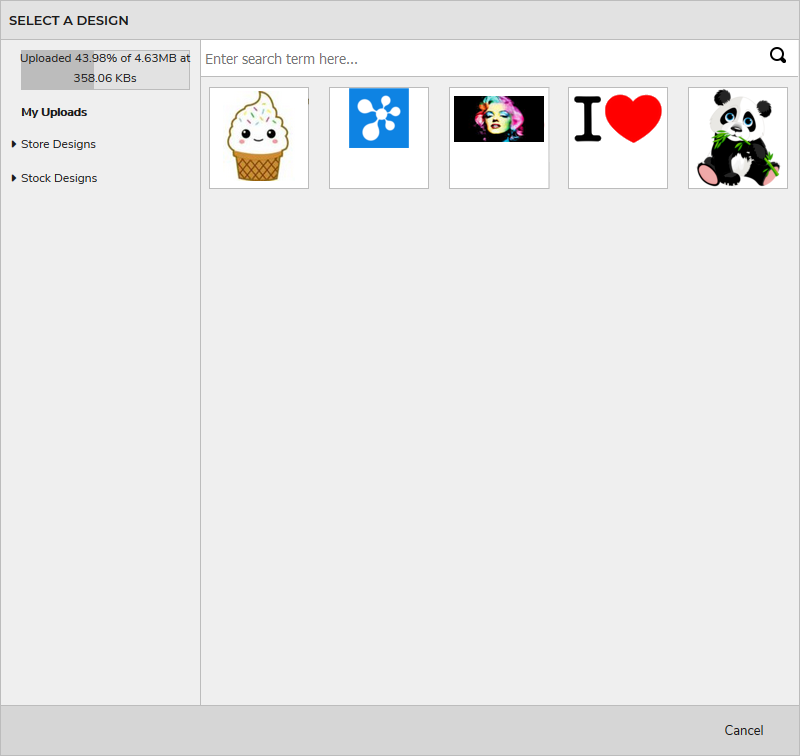
Upload your own artwork or choose from our design library.

Method A: Using the Add Design Button

  • 1
    Click "Add Design" Add Design Button
  • 2
    Choose Decoration Type Select Type of Design
  • 3
    Browse & Select Choose from "My Uploads," "Store Designs," or "Stock Designs." Select A Design

Method B: Drag & Drop

Simply drag an image file from your computer directly into the decoration area!

Uploading Design
Copyright Notice: You'll need to confirm that you have permission to use any uploaded artwork. Copyright Confirmation

Image Properties Panel

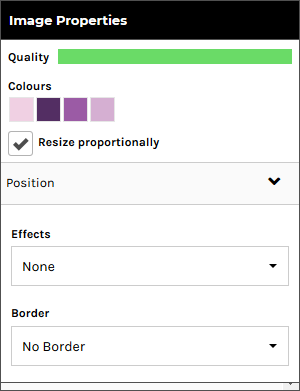
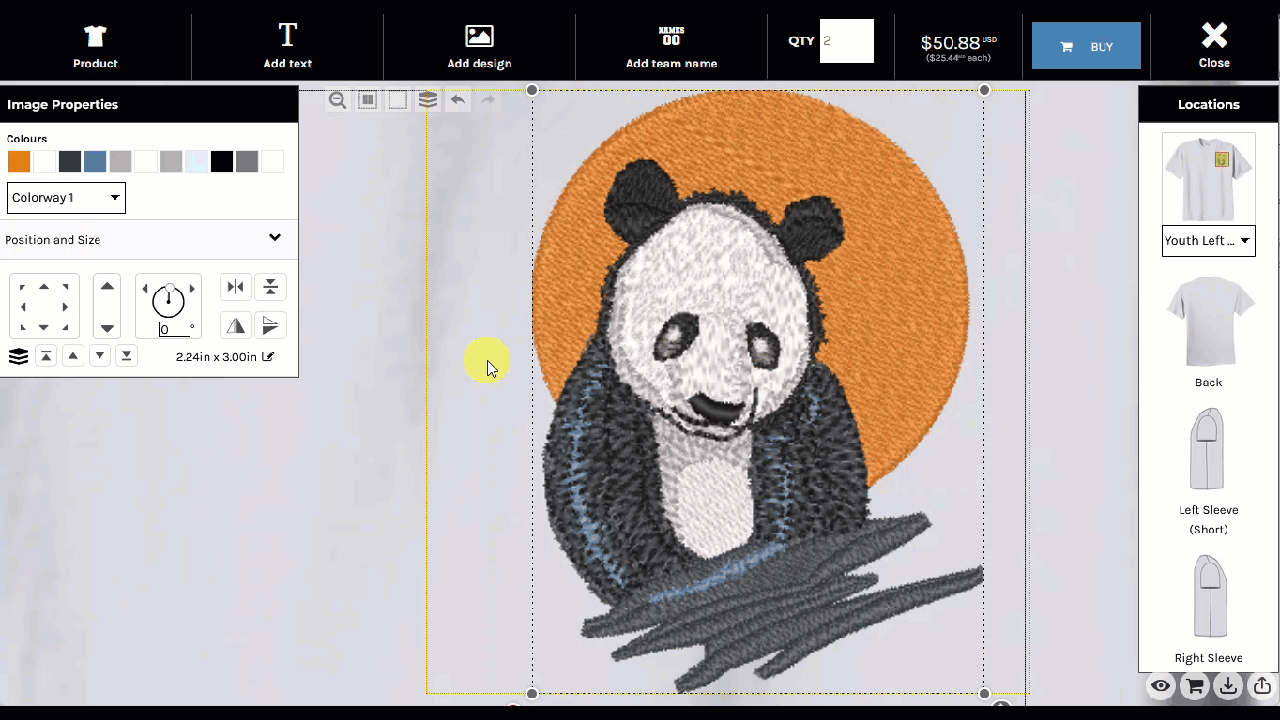
After adding a design, use the Image Properties panel to adjust size, position, and effects.

Image Properties Panel

Effects Section:

Image Effects Section

Step 5 Recoloring Embroidery Designs

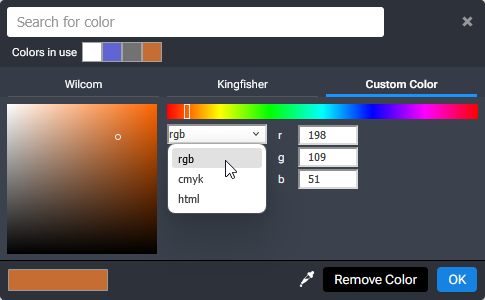
Customize the thread colors of embroidery designs to match your brand or preferences.

Recolor Embroidery
  • 1
    Click on the Embroidery Design Select the embroidery element on your product.
  • 2
    Find the Color Swatches In the Image Properties panel, you'll see the current thread colors.
  • 3
    Click a Color to Change It The Color Picker will open with multiple options.

Color Picker Options:

Color Modes: Choose from different color input methods (palette, RGB, CMYK, HEX).

Color Picker Modes

Thread Code Search: Search for specific thread brands or codes.

Thread Code Search

Step 6 Adding Team Names & Numbers

Perfect for sports teams, clubs, or group orders! Add personalized names and numbers for each member.

  • 1
    Click "Add Team Name" Add Team Name Button
  • 2
    Select Decoration Type Select Team Name Type
  • 3
    Enter Sizes & Quantities Specify how many of each size you need. Add Team Name Popup
  • 4
    Fill in Names & Numbers Enter each player's details. Edit Team Name

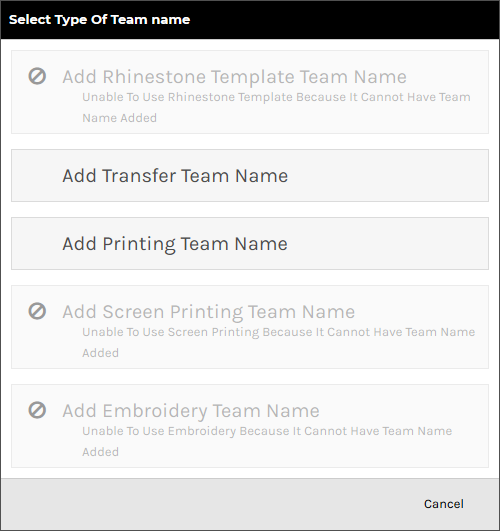
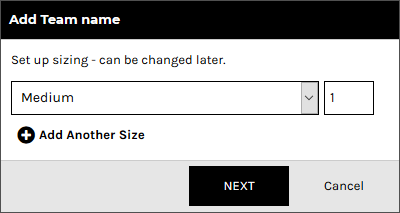
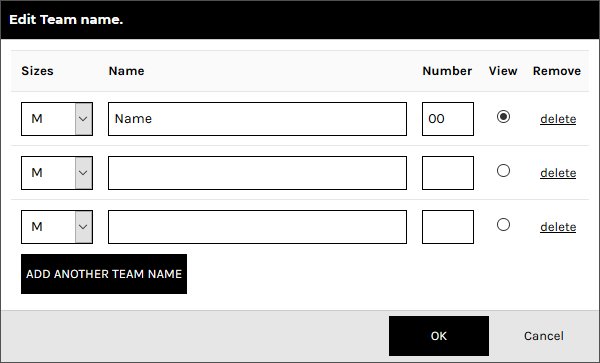
The system automatically styles the names in a jersey-inspired layout:

Team Name on Product

Step 7 Working with Layers

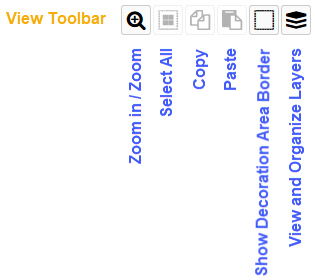
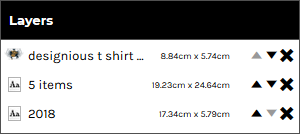
Layers control the stacking order of your design elements. Top layers cover those beneath.

Click the "View/Organize Layers" button in the View Toolbar:

View Layers Button

The Layers Panel shows all your design elements:

Layers Panel
Tip: Drag layers up or down to change their order. Move important text to the top so it's not hidden behind images!

Step 8 Saving & Sharing Your Design

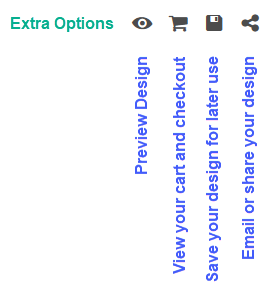
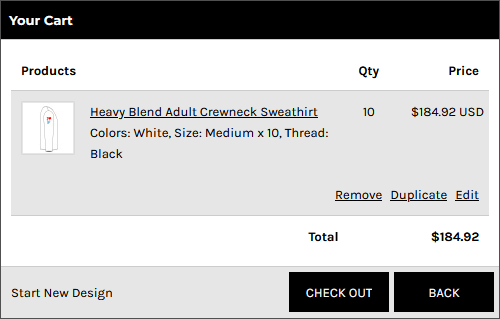
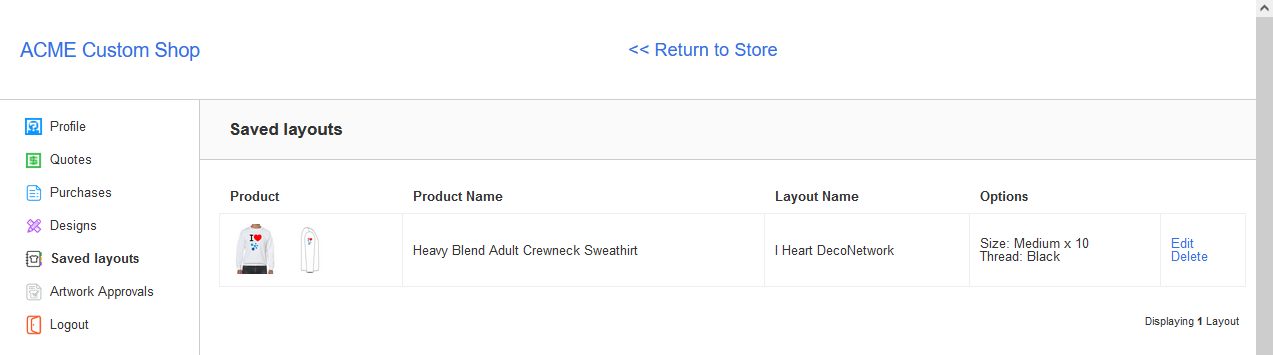
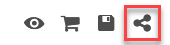
Once you're happy with your design, you have several options:

Preview Your Design

Click the Eye icon to see a clean mockup without watermarks.

Preview Icon Design Preview

Add to Cart

Click the Cart icon to review your order and proceed to checkout.

Cart Icon Your Cart

Save for Later

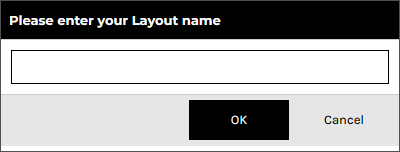
Click the Disk icon to save your design to your account.

Save Icon
  1. Log in or create an account if prompted Login Prompt
  2. Enter a name for your layout Enter Layout Name
  3. Find your saved designs in "My Account" → "Saved Layouts" Saved Layouts

Share Your Design

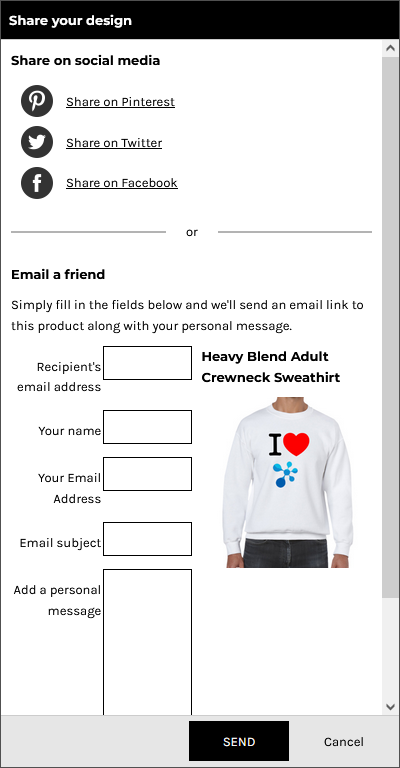
Click the Share icon to post your design on social media or email it to friends.

Share Icon Share Options

Ready to Create Your Design?

Start designing your custom apparel now!

Start Designing
Search
Your cart is empty

Select Currency

{CC} - {CN}